- 2 Sections
- 72 Lessons
- Lifetime
- Project Influencer Guide Part 132
- 1.1Introduction
- 1.2Types of Influencers
- 1.3Influencer Toolkit
- 1.4Determine Your Niche
- 1.5Building your brand
- 1.6Get creative with your name
- 1.7Brand Identity: Logo or Headshot
- 1.8Writing and Optimising your Bio
- 1.9Aesthetics: How to create a cohesive aesthetic to build your brand
- 1.10Instagram Presets
- 1.11Creating a social media account
- 1.12How to create a business Instagram account
- 1.13How to add content on Instagram
- 1.14Your first post on Instagram
- 1.15Making the most of Instagram’s other features
- 1.16All about Instagram Stories and Highlights
- 1.17How to switch to a business TikTok account
- 1.18How to add content on TikTok
- 1.19Your first video on TikTok
- 1.20Making the most of TikTok’s other features
- 1.21How to create a business YouTube Account
- 1.22How to add content to YouTube
- 1.23Your first Video on YouTube
- 1.24Making the most of YouTube’s other features
- 1.25Content posting schedule
- 1.26How Often should I post?
- 1.27Weekly Content Calendar: Instagram
- 1.28Weekly Content Calendar: TikTok
- 1.29Weekly Content Calendar: YouTube
- 1.30Helpful Tips
- 1.31Step-By-Step Checklist
- 1.32Next Steps
- Project Influencer Guide Part 240
- 2.1Introduction – Part 2
- 2.2Elevate Your Instagram Content
- 2.3Elevate Your TikTok Content
- 2.4Elevate Your YouTube Content
- 2.5Diversify Your Social Media Platforms
- 2.6Boost Engagement With Reels and TikToks
- 2.7Staying Updated With Trends
- 2.8Engage Your Audience
- 2.9Perform Audience Research
- 2.10Understanding Analytics
- 2.11Instagram Insights
- 2.12TikTok Analytics
- 2.13YouTube Analytics
- 2.14Monetisation
- 2.15Instagram Monetisation
- 2.16Instagram Sponsored Posts
- 2.17TikTok Monetisation
- 2.18Create a TikTok Shop
- 2.19YouTube Monetisation
- 2.20Brand Collaborations
- 2.21Beyond Social Media: Why Your Brand Needs a Website
- 2.22Key Strategies for Identifying Collaborative Brand Opportunities
- 2.23Invitation to Influencer/Creator Events
- 2.24Strategic and Professional Approach: Key Steps for Influencers When Approaching Brands
- 2.25How to Determine Your Rates
- 2.26Influencer Rate Checklist
- 2.27How To Approach Brands
- 2.28Troubleshooting: How To Approach Brands
- 2.29Brand Pitch Email Template Example 1
- 2.30Brand Pitch Email Template Example 2
- 2.31Brand Pitch Email Template Example 3
- 2.32Brand Pitch Email Template Example 4
- 2.33Influencer Media Kit
- 2.34How to Create Your Media Kit (3 Templates Included)
- 2.35Pitch Sent, Now What?
- 2.36Brand Partnership Agreement
- 2.37Extra Resources For Influencers: Must-Have Apps
- 2.38UK Brand With Affiliate Programs For Influencers/Creators
- 2.3950 Additional Brands To Look Into As An Influencer
- 2.40Congratulations!
Influencer Toolkit
LET'S GET STARTED!
INFLUENCER TOOLKIT
Becoming an influencer on platforms like TikTok, Instagram, or YouTube can be an exciting journey, having the right tools can make the process smoother. Here’s a basic toolkit to help you get started, use the check boxes on the left to mark things off:
1. Camera:
Smartphone: Modern smartphones have good-quality cameras that are sufficient for starting out on platforms like TikTok and Instagram. For many, this is all you’ll need. Always check your video settings (shoot in high resolution, check you have good lighting etc) before filming.
Digital Camera: If you’re looking to invest and want higher quality, especially for YouTube, a digital camera like a DSLR or mirrorless camera might be a good choice. Brands like Canon, Sony, and Panasonic offer cameras in different price ranges that are suitable for video content.
2. Tripod & Stabilizers:
Phone Tripod: A small tripod can help you set up shots without needing someone to hold the camera
3. Lighting:
Natural Light: Always the best option when available.
Ring Light: Popular with influencers for its even lighting, especially for face shots or makeup tutorials.
Soft box: Useful for YouTube content where you want a more professional look.
4. Microphone:
Clip-on (Lavalier) Mic: Useful for clear voice recording, especially in noisy environments.
Shotgun Mic: Good for vlogging, as it focuses on capturing sound from one direction.
5. Editing/Graphics Software & Apps:
TikTok & Instagram: Both platforms have built-in editing tools which are often sufficient for basic edits. InShot: A versatile mobile app for editing videos and photos. Available for both Android and iOS. Kinemaster: A mobile video editing app with more advanced features.
Canva: A free web-based tool for creating graphics, thumbnails, and much more. They also offer a mobile app.
6. Scheduling & Management Tools:
Later: Good for scheduling Instagram posts.
Hootsuite: Allows you to schedule posts across different platforms.
TubeBuddy: A browser extension to help with YouTube SEO, scheduling, and analytics.
7. Music & Sound Effects:
YouTube Audio Library: Offers a variety of free songs and sound effects.
Epidemic Sound: Subscription-based service popular with YouTubers for copyright-free music.
TikTok: Has an inbuilt library of popular tracks to use.
8. Storage & Backup:
Google Drive or Dropbox: Useful for backing up your content and accessing it from anywhere.
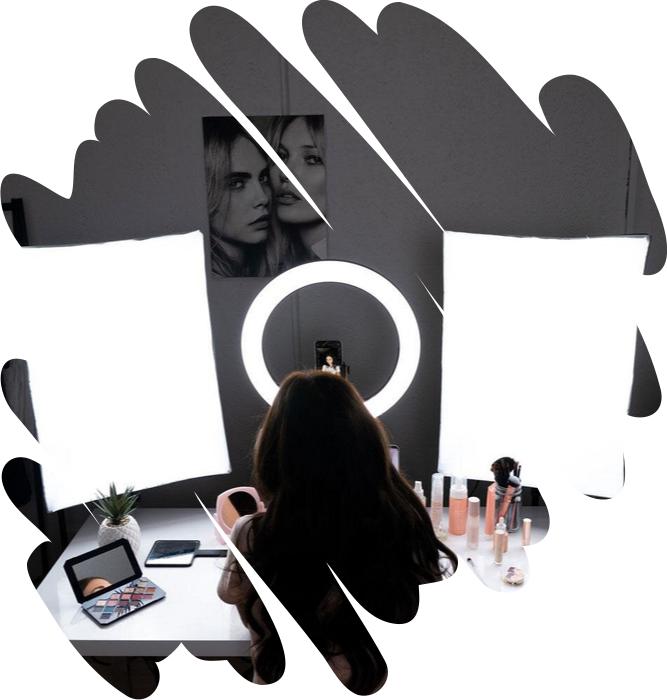
9. Laptop & Internet connection
10. Location: Make sure that you have quiet space for content creation. This can be as simple as a bedroom or spare room at home. Remember content can be created anywhere whether inside, outside or when you are travelling.